
Home | Examples | Help | Contact Us
Your font in 8 steps : 1 Print | 2 Write | 3 Scan | 4 Upload | 5 Preview | 6 Buy | 7 Download | 8 Install
Use a suitable pen (e.g. a black permanent marker of fine or medium thickness) to draw the characters the way that you normally write. If you find that your generated font is excesssively bold or light, select another pen. Make sure you draw your characters into the designated cells.
Only characters that are written down on the template are added to the font, so if you only need a few characters, then only write those down. If you don’t want accented characters, you can skip page two of the template.
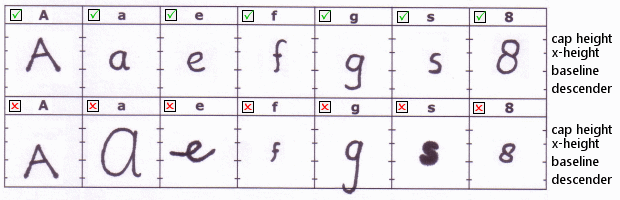
All cells (except the signature cell) contain horizontal guidelines (actually four little marks on both left and right side of each cell) that should help you write the characters in the right dimensions, and in the best possible position in each cell.
The image below shows examples of how best to complete the template (top row with green tick marks), and some examples of situations to avoid (bottom row, red crosses).
REMEMBER, it costs nothing to experiment so if you make a mistake first time around and want to make changes after you preview the font (BEFORE purchasing), then feel free to upload a new template and try again.
When you’ve drawn all characters you want to include in your font go to Step 3 and scan the completed template.